This guide explains how to install and configure EPrints on an Ubuntu server.
Update and upgrade the package list:
sudo apt update && sudo apt upgrade -yOr
sudo apt update
sudo apt upgrade -yapt install perl libncurses5 libselinux1 apache2 libapache2-mod-perl2 libxml-libxml-perl \
libunicode-string-perl libterm-readkey-perl libmime-lite-perl libmime-types-perl libdigest-sha-perl \
libdbd-mysql-perl libxml-parser-perl libxml2-dev libxml-twig-perl libarchive-any-perl libjson-perl \
liblwp-protocol-https-perl libtext-unidecode-perl lynx wget ghostscript poppler-utils antiword elinks \
texlive-base texlive-base-bin psutils imagemagick adduser tar gzip unzip libsearch-xapian-perl \
libtex-encode-perl libio-string-perl libdbd-mysql-perl git xpdf python3-html2text make -yRun Once Again For Install or check the missing packages
apt-get install perl libncurses5 libselinux1 apache2 libapache2-mod-perl2 libxml-libxml-perl \
  libunicode-string-perl libterm-readkey-perl libmime-lite-perl libmime-types-perl libdigest-sha-perl \
  libdbd-mysql-perl libxml-parser-perl libxml2-dev libxml-twig-perl libarchive-any-perl libjson-perl \
  liblwp-protocol-https-perl libtext-unidecode-perl lynx wget ghostscript poppler-utils antiword elinks \
  texlive-base texlive-binaries psutils imagemagick adduser tar gzip unzip libsearch-xapian-perl \
libtex-encode-perl libio-string-perl python3-html2text make libexpat1-dev libxslt1-devInstall MySQL Server and Client
sudo apt install mysql-server mysql-client libmysqlclient-dev -y(Optional: Run this command again if necessary)
sudo apt install mysql-server mysql-client -yRun the following commands in MySQL:
sudo mysql⚠️❗ Important Changes
eprints → your_usernamechangeme → your_passwordCREATE USER 'eprints'@'localhost' IDENTIFIED BY 'changeme';
GRANT ALL PRIVILEGES ON *.* TO 'eprints'@'localhost' WITH GRANT OPTION;
FLUSH PRIVILEGES;
EXIT;↪ Read: EPrints Installation Documentation
⚠️❗ Important Changes
password → your_passwordSet a password when prompted (replace password with your secure password).
Add a new system user:
sudo adduser eprintsSet the password:
passwordEdit the Apache environment file:
sudo nano /etc/apache2/envvarsFind and update the following lines. It's a good idea to comment out the default user/group for clarity:
# Comment out default user/group
# export APACHE_RUN_USER=www-data
# export APACHE_RUN_GROUP=www-data

# Set Apache to run as the 'eprints' user and group
export APACHE_RUN_USER=eprints
export APACHE_RUN_GROUP=eprints
After saving the file, restart Apache to apply the changes:
sudo systemctl restart apache2Allow mutual access between the eprints and www-data users by adding each to the other's group. This ensures both users have the necessary file access.
sudo usermod -a -G eprints www-data
sudo usermod -a -G www-data eprints
⚠️❗ These changes won’t take full effect until the users log out and back in or you restart the system. For services like Apache, a restart is typically enough.
sudo systemctl restart apache2sudo mkdir /opt/eprints3sudo chown eprints:eprints /opt/eprints3sudo chmod 2775 /opt/eprints3Switch to the eprints user:
su -l eprintsClone the EPrints 3.4 repository into /opt/eprints3:
git clone https://github.com/eprints/eprints3.4.git /opt/eprints3Navigate to the EPrints directory and check out the desired release tag:
cd /opt/eprints3
git checkout tags/v3.4.6Switch to the eprints user:
su -l eprintsRun the EPrints admin tool to create your repository:
bin/epadmin createCreate a publications flavour archive:
Enter Archive ID: repo
Create a pub Repository

Please select an ID for the repository, which will be used to create a directory
and identify the repository. Lower case letters, numbers and underscores, may not start with
a number or underscore. examples: "lemurprints", "test3" or "research_archive"

Archive ID? repo
Configure vital settings, press ENTER:
Ok. I've created the initial config files and directory structure.
I've also created a "disk0" directory under documents/ if you want
your full texts to be stored on a different partition then remove
the disk0, and create a symbolic link to the directory you wish to
store the full texts in. Additional links may be placed here to be
used when the first is full.


Configure vital settings? [yes] ? ENTER
Enter the hostname for the repository:
Core configuration for repo


Please enter the fully qualified hostname of the repository.

For a production system we recommend against using the real hostname of the
machine.

Example: repo.footle.ac.uk

Hostname? repo.aminlabs.my.id
Note: Make sure to replace your_subdomain with your actual subdomain.
Webserver port, press ENTER:
Please enter the port of the webserver. This is probably 80, but you may wish
to run apache on a different port if you are experimenting.

Webserver Port [80] ? ENTER
Alias for hostname, press ENTER:
Please enter all the aliases which could reach the repository, and indicate if
you would like EPrints to write a Redirect Rule to redirect requests to this
alias to the correct URL.
Some suggestions:
aminlabs.example.org
aminlabs.example
aminlabs
repo.aminlabs
repo

Enter a single hash (#) when you're done.

Alias (enter # when done) [#] ? ENTER
Repository’s base URL, press ENTER:
Please enter the path part of the repository's base URL. This should probably
be '/'.

Path [/] ? ENTER
Enter hostname for HTTPS:
Note: If use Localhost then leave blank.HTTPS HOSTNAME
If you will use https for your user pages (including login) enter the https hostname
here, or leave blank when using http only.

HTTPS Hostname [] ? repo.aminlabs.my.id
Secure webserver port, press ENTER:
Please enter the port of your secure (https) server. This is probably 443.

Secure Webserver Port [443] ? ENTER
Enter email for administrator account:
Administrator Email? repo@aminlabs.my.idEnter the name of the repository:
Enter the name of the repository in the default language. If you wish to enter
other titles for other languages or enter non ascii characters then you may
enter something as a placeholder and edit the XML config file which this
script generates.

Archive Name [Test Repository] ? AminLabs Repository
Enter organisation name:
Enter the name of the organisation in the default language. Again, if you wish to enter
other titles for other languages or enter non ascii characters then you may
enter something as a placeholder and edit the XML config file which this
script generates.

Organisation Name [Organisation of Test] ? AminLabs
Writer the core settings, press ENTER:
Write these core settings? [yes] ? ENTERConfigure database, press ENTER:
Configure database? [yes] ? ENTERDatabase configuration, press ENTER:
Database Name [repo] ? ENTER
MySQL Host [localhost] ? ENTER

You probably don't need to set socket and port (unless you do!?).
MySQL Port (# for no setting) [#] ? ENTER
MySQL Socket (# for no setting) [#] ? ENTER
Database User [repo] ? ENTER
Database Password [pqpVxhhgg7zdZznR] ? ENTER
Database Engine [InnoDB] ? ENTER

Write these database settings? [yes] ? ENTER
Enter MySQL superuser:
EPrints can create the database, and grant the correct permissions.

Create database "repo" [yes] ? ENTER
Create database "repo" [yes] ?
Database Superuser Username [root] ? eprints
Database Superuser Password? PASSWORD
Create database tables? [yes] ? ENTER
Create administrator account:
Create an initial user? [yes] ? ENTER
Creating a new user in repo

Enter a username [admin] ? ENTER
Select a user type (user|editor|admin) [admin] ? ENTER
Enter Password? PASSWORD
Email? repo@aminlabs.my.id
Build the static web pages, press ENTER:
Successfully created new user:
  ID: 1
Do you want to build the static web pages? [yes] ? ENTER
Import the LOC subjects and sample, press ENTER:
Do you want to import the LOC subjects and sample divisions? [yes] ? ENTERUpdate the apache config files, press ENTER:
Do you want to update the apache config files? (you still need to add the 'Include' line) [yes] ? ENTER The repository creation is complete, but additional configuration needs to be added in Apache.
Wrote /opt/eprints3/cfg/apache.conf
Wrote /opt/eprints3/cfg/apache_ssl.conf
Wrote /opt/eprints3/cfg/perl_module_isolation.conf
Wrote /opt/eprints3/cfg/perl_module_isolation_vhost.conf
Wrote /opt/eprints3/cfg/apache/repo.conf
Wrote /opt/eprints3/cfg/apache_ssl/repo.conf

Add the following line to your apache configuration:
 Include /opt/eprints3/cfg/apache.conf

You must restart apache for any changes to take effect!

--------------------------------------------------------------------------
That seemed to more or less work ...
--------------------------------------------------------------------------

Now make any required changes to the cfg files.

Note that changing the metadata configuration may require the database
tables to be regenerated. epadmin erase_eprints will regenerate the
eprints and documents tables only. erase_data will regenerate everything.
(nb. these also do erase the contents of the tables, and any uploaded
files).

Make sure that your main apache config file contains the line:

 Include /opt/eprints3/cfg/apache.conf

Then stop and start your webserver:
Often:
 /etc/rc.d/init.d/httpd stop
 /etc/rc.d/init.d/httpd start
(or maybe /usr/local/apache/bin/apachectl graceful)

And then try connecting to your repository.
--------------------------------------------------------------------------exit🧾 Create the Apache configuration file for EPrints
⚠️❗ Important Warning
Each time this command runs, it adds the line again, resulting in duplicate includes, which can cause problems or confusion.
sudo nano /etc/apache2/sites-available/eprints.confAdd the following line:
Include /opt/eprints3/cfg/apache.conf✅ Enable the EPrints site and disable the default Apache site
sudo a2ensite eprints.conf
sudo systemctl restart apache2
Disable the default site (only once is necessary):
sudo a2dissite 000-default.conf
sudo systemctl restart apache2
🌐 Set ServerName with your public IP (Optional – if not using a domain)
ip=$(dig +short myip.opendns.com @resolver1.opendns.com -4)
sed -i "s/#ServerName www.example.com/ServerName ${ip}/g" /etc/apache2/sites-available/000-default.conf
⚠️❗ Important Warning
Each time this command runs, it adds the line again, resulting in duplicate includes, which can cause problems or confusion.
echo "Include /opt/eprints3/cfg/apache.conf" >> /etc/apache2/apache2.conf🔄 Restart Apache to apply all changes
sudo systemctl restart apache2⚠️ Only perform this step if you're testing on localhost and not using a live domain.
Open /etc/hosts:
sudo nano /etc/hostsAdd the following lines at the end of the file:
127.0.0.1    repo.mydomain.co.in
127.0.1.1    repo.mydomain.co.in
Save and exit. This allows the system to resolve repo.mydomain.co.in to your local machine.
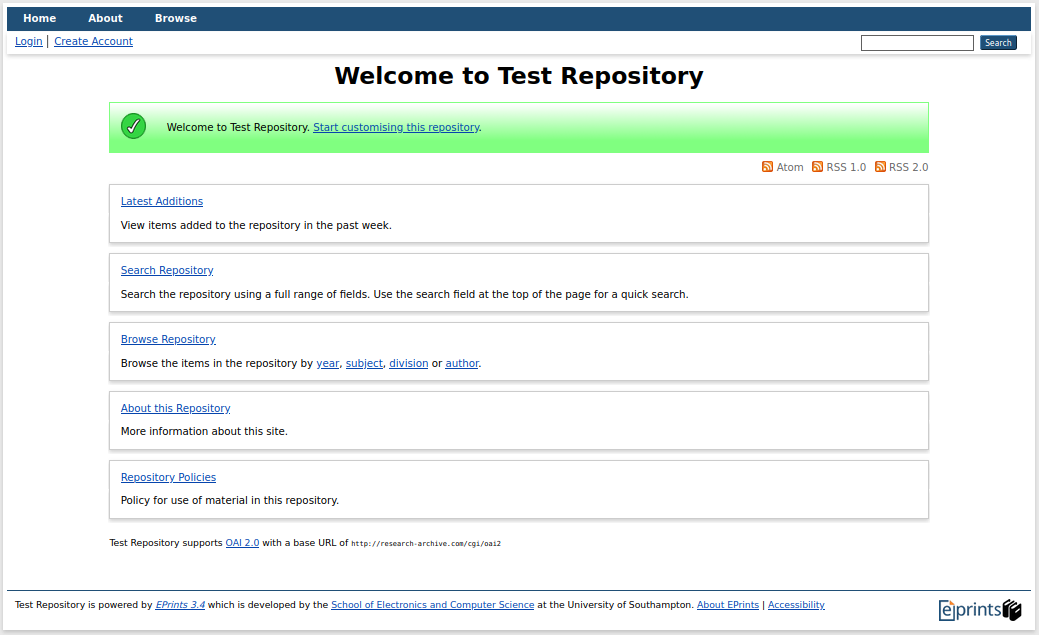
Click:
http://research_archive.com